Bootstrap Popover Placement
Intro
The versions
Bootstrap is one of the most free and useful open-source platforms to develop websites. The latest version of the Bootstrap platform is known as the Bootstrap 4.
Usage of the Bootstrap 4
By using Bootstrap 4 you can establish your site now quicker than ever before. It is comparatively incredibly simpler to work with Bootstrap to develop your website than some other systems. Having the integration of HTML, CSS, and JS framework it is one of the most leading programs for website advancement.
Several components and methods in Bootstrap 4
Just some of the most effective functions of the Bootstrap 4 provide:
• An improved grid system that enables the user to obtain mobile device welcoming websites along with a fair amount of ease.
• Several utility instruction sets have been included in the Bootstrap 4 to help with easy studying for starters in the field of web site creation.
Factors to take note
Step 2: Rewrite your article by highlighting words and phrases.
Together with the start of the brand new Bootstrap 4, the ties to the older variation, Bootstrap 3 have not been completely removed. The creators have made certain that the Bootstrap 3 does get periodic upgrade and fault fixes as well as renovations. It will be accomplished even after the final produce of the Bootstrap 4.
Contrasts about Bootstrap 4 and Bootstrap 3
• The support for many internet browsers along with operating systems has been involved in the Bootstrap 4
• The global sizing of the font style is increased for pleasant viewing and website development practical experience
• The renaming of several elements has been completed to ensure a much faster and even more trusted web-site development system
• By having new modifications, it is feasible to develop a much more active website with minor efforts
Bootstrap Popover Container
And now let us go to the main subject.
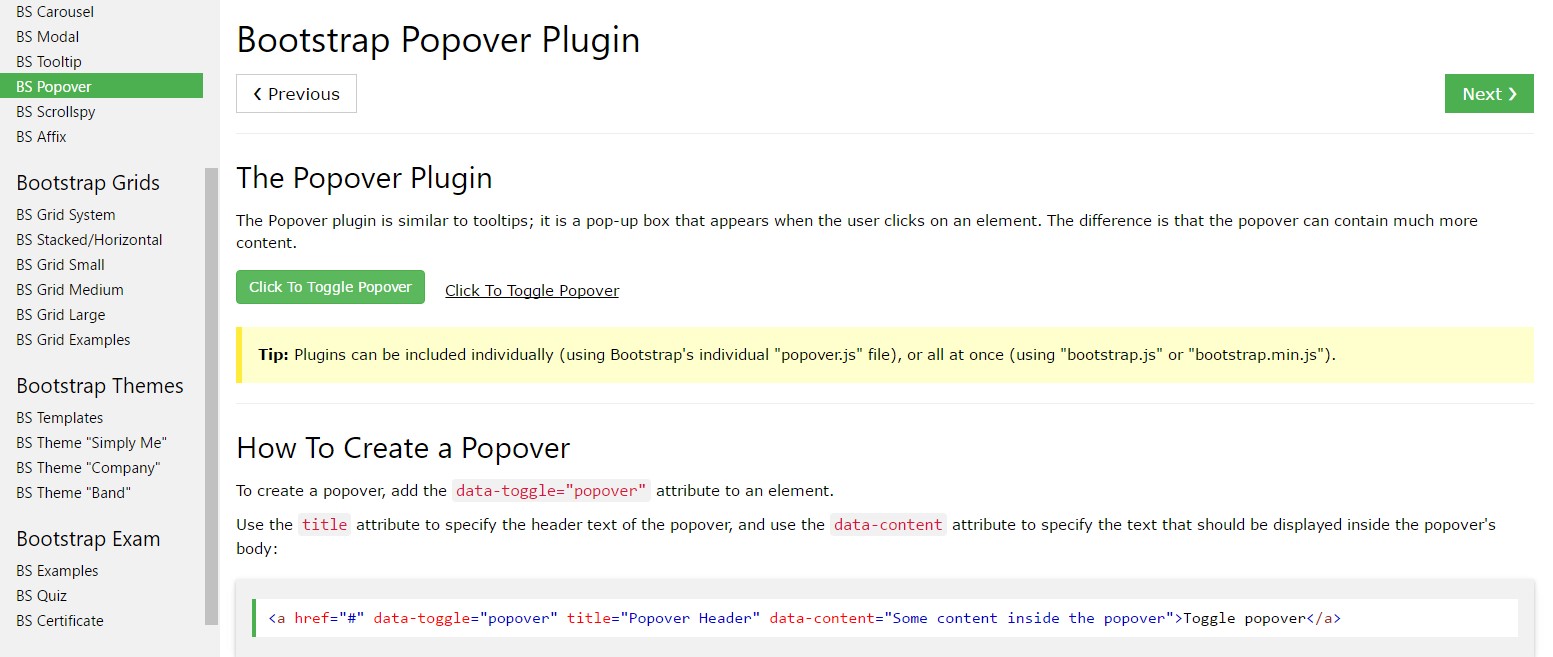
Assuming that you wish to incorporate some backup information on your website you can certainly put into action popovers - simply provide compact overlay content.
The best ways to work with the popover plugin:
- Bootstrap Popover Position lean on the 3rd party library Tether for positioning. You will need to include tether.min.js prior to bootstrap.js straight for popovers to run!
- Popovers demand the tooltip plugin as a dependency .
- Popovers are opt-in for functionality reasons, so that you must activate them by yourself.
- Zero-length title and content values will never ever show a Bootstrap Popover Container.
- Identify container:'body' to avert rendering concerns around more complex elements (like Bootstrap input groups, button groups, etc).
- Producing popovers on hidden features will not run.
- Popovers for . disabled or disabled features must be triggered on a wrapper element. - Anytime triggered directly from weblinks that span numerous lines, popovers will be centered. Use white-space: nowrap; on your <a>-s to prevent this kind of behavior.
Did you found out? Excellent, let's see precisely how they function with some illustrations.
You must include tether.min.js right before bootstrap.js in order for popovers to work!
An example: Set up popovers all over
One solution to initialize each of popovers on a page would undoubtedly be to choose them by their data-toggle attribute:
$(function ()
  $('[data-toggle="popover"]').popover()
)
An example: Making use of the container method
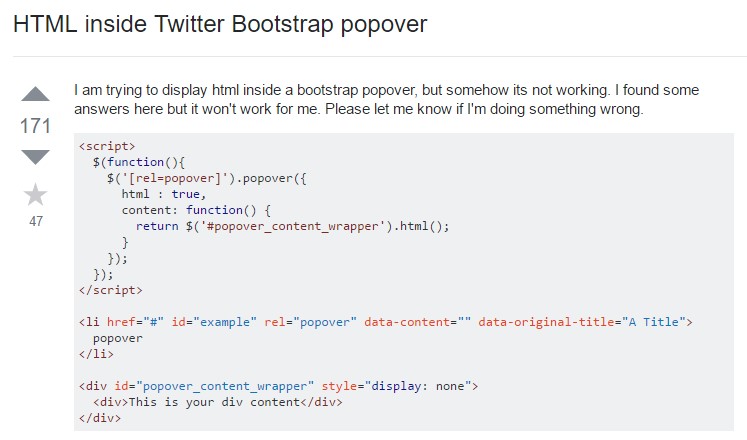
Every time you possess certain designs on a parent feature which meddle with a popover, you'll wish to define a custom-made container That the popover's HTML appears within that element instead.
$(function ()
$('.example-popover').popover(
container: 'body'
)
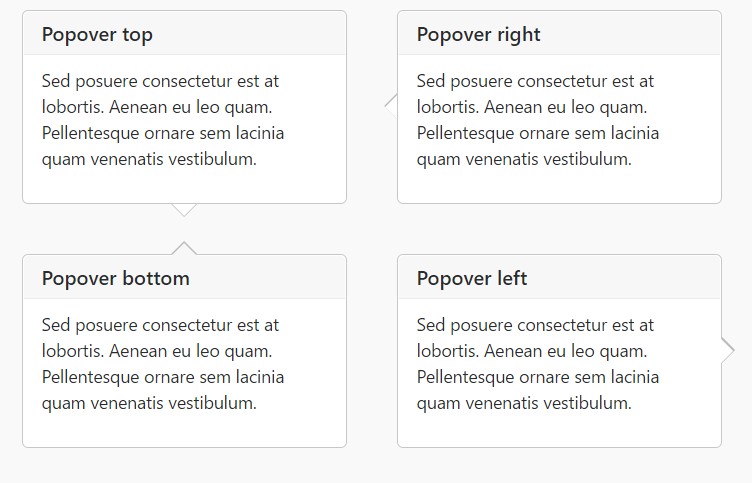
)Static popover
Four possibilities are readily available: top, right, lowest part, and left aligned.
Live demo
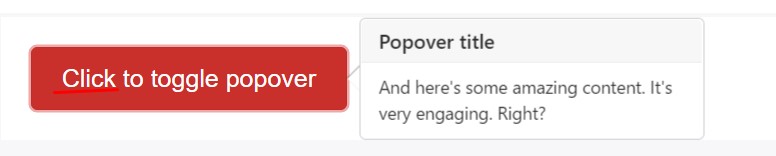
<button type="button" class="btn btn-lg btn-danger" data-toggle="popover" title="Popover title" data-content="And here's some amazing content. It's very engaging. Right?">Click to toggle popover</button>Four positions
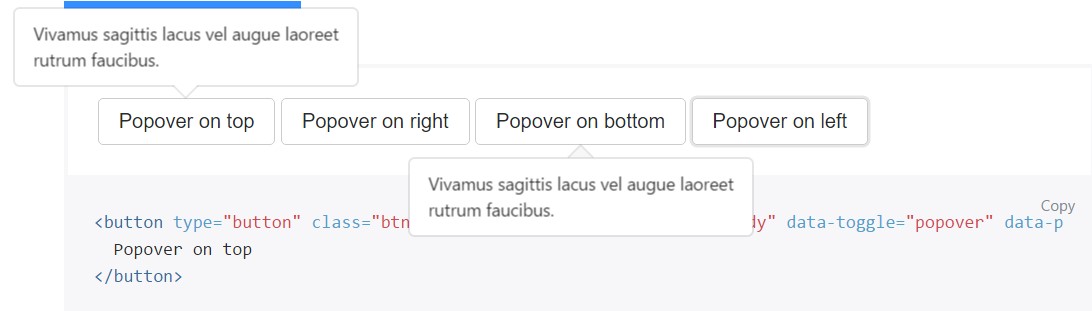
<button type="button" class="btn btn-secondary" data-container="body" data-toggle="popover" data-placement="top" data-content="Vivamus sagittis lacus vel augue laoreet rutrum faucibus.">
  Popover on top
</button>

<button type="button" class="btn btn-secondary" data-container="body" data-toggle="popover" data-placement="right" data-content="Vivamus sagittis lacus vel augue laoreet rutrum faucibus.">
  Popover on right
</button>

<button type="button" class="btn btn-secondary" data-container="body" data-toggle="popover" data-placement="bottom" data-content="Vivamus
sagittis lacus vel augue laoreet rutrum faucibus.">
  Popover on bottom
</button>

<button type="button" class="btn btn-secondary" data-container="body" data-toggle="popover" data-placement="left" data-content="Vivamus sagittis lacus vel augue laoreet rutrum faucibus.">
  Popover on left
</button>
Dismiss on next mouse click
Work with the focus trigger to turn out popovers on the next hit that the site visitor does.
Specialised markup expected for dismiss-on-next-click
For proper cross-browser as well as cross-platform actions, you must work with the <a> tag, certainly not the <button> tag, and you as well will need to incorporate a tabindex attribute.
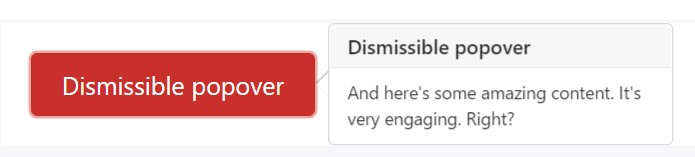
<a tabindex="0" class="btn btn-lg btn-danger" role="button" data-toggle="popover" data-trigger="focus" title="Dismissible popover" data-content="And here's some amazing content. It's very engaging. Right?">Dismissible popover</a>$('.popover-dismiss').popover(
trigger: 'focus'
)Usage
Set up popovers by JavaScript
$('#example').popover(options)Options
Options can possibly be pass on through data attributes as well as JavaScript. For data attributes, add the option name to data-, as in data-animation="".
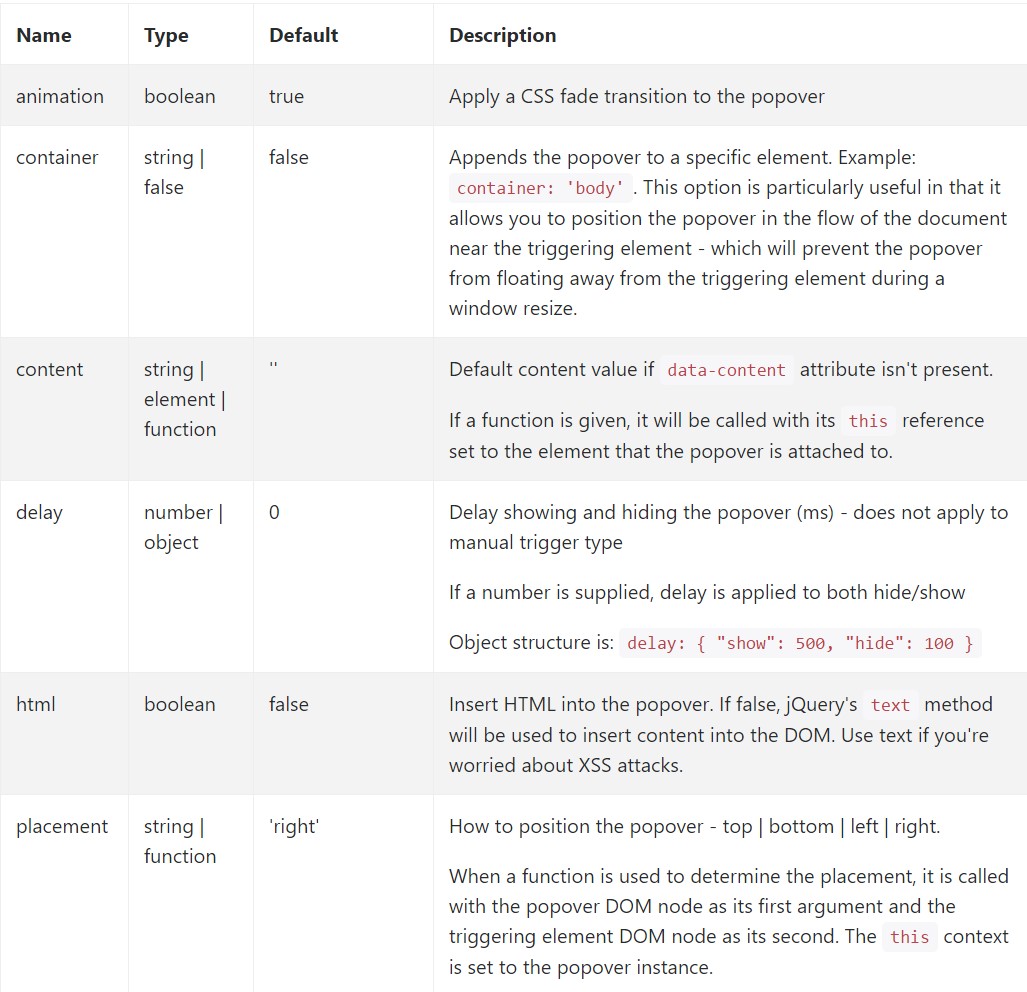

Data attributes for separate popovers
Selections for individual popovers can alternatively be specified throughout the application of data attributes, as illustrated above.
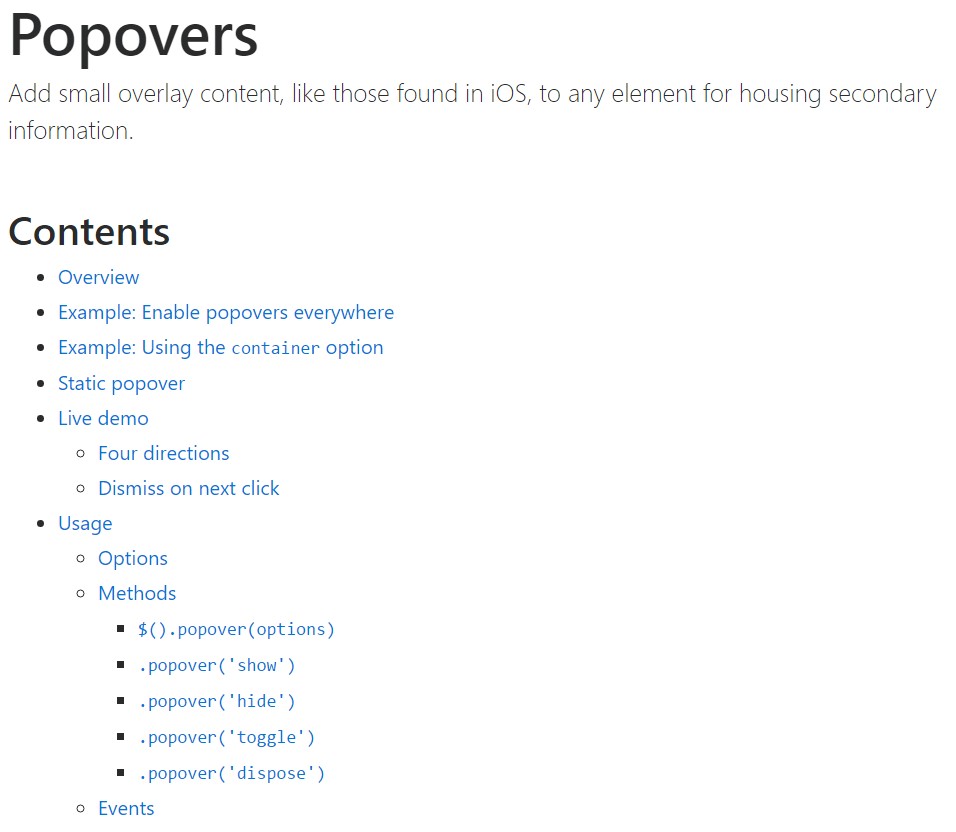
Solutions
$().popover(options)
Initializes popovers with regard to the element collection.
.popover('show')
Reveals an element's popover. Come back to the caller just before the popover has certainly been revealed (i.e. prior to the shown.bs.popover event happens). This is viewed a "manual" triggering of the popover. Popovers whose both title and web content are zero-length are never displayed.
$('#element').popover('show')
.popover('hide')
Hides an element's popover. Returns to the caller right before the popover has really been disguised (i.e. just before the hidden.bs.popover activity occurs). This is regarded a "manual" triggering of the popover.
$('#element').popover('hide')
.popover('toggle')
Activate an element's popover. Comes back to the user before the popover has truly been presented or disguised (i.e. before the shown.bs.popover or hidden.bs.popover activity takes place). This is considered a "manual" triggering of the popover.
$('#element').popover('toggle')
.popover('dispose')
Disguise and eliminates an element's popover. Popovers which put into action delegation (which are developed working with the selector possibility) can not be individually wiped out on descendant trigger elements.
$('#element').popover('dispose')
Events
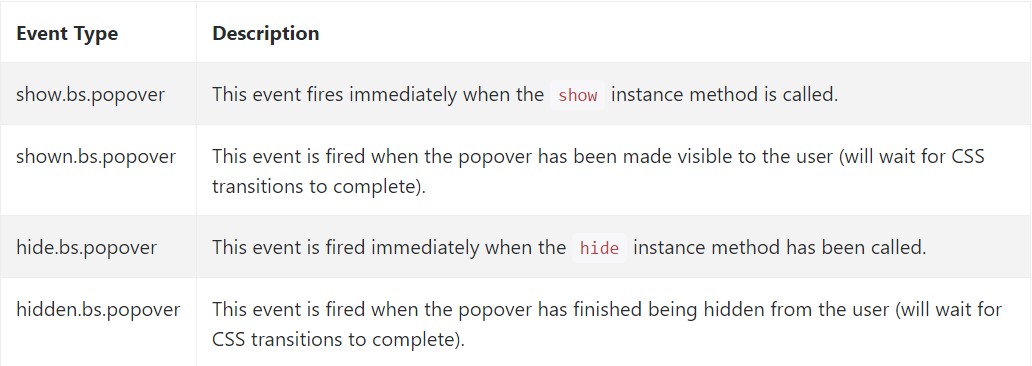
$('#myPopover').on('hidden.bs.popover', function ()
  // do something…
)
Examine several video tutorials about Bootstrap popovers
Connected topics:
Bootstrap popovers authoritative records
Bootstrap popovers article
Bootstrap Popover trouble
$().popover(options)
Initializes popovers with regard to the element collection.
.popover('show')
Reveals an element's popover. Come back to the caller just before the popover has certainly been revealed (i.e. prior to the shown.bs.popover event happens). This is viewed a "manual" triggering of the popover. Popovers whose both title and web content are zero-length are never displayed.
$('#element').popover('show').popover('hide')
Hides an element's popover. Returns to the caller right before the popover has really been disguised (i.e. just before the hidden.bs.popover activity occurs). This is regarded a "manual" triggering of the popover.
$('#element').popover('hide').popover('toggle')
Activate an element's popover. Comes back to the user before the popover has truly been presented or disguised (i.e. before the shown.bs.popover or hidden.bs.popover activity takes place). This is considered a "manual" triggering of the popover.
$('#element').popover('toggle').popover('dispose')
Disguise and eliminates an element's popover. Popovers which put into action delegation (which are developed working with the selector possibility) can not be individually wiped out on descendant trigger elements.
$('#element').popover('dispose')Events
$('#myPopover').on('hidden.bs.popover', function ()
// do something…
)Examine several video tutorials about Bootstrap popovers
Connected topics:
Bootstrap popovers authoritative records
Bootstrap popovers article
Bootstrap Popover trouble